

Web & Social Analytics
Connect Google Analytics, Metricool, and Meta Pixel to see how visitors find and use your website, and how your social media and ads are performing.
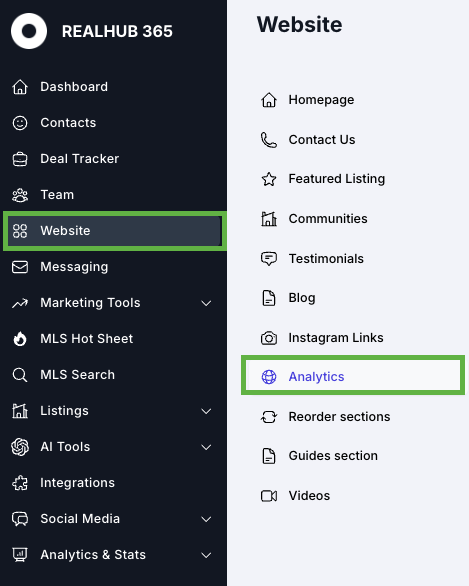
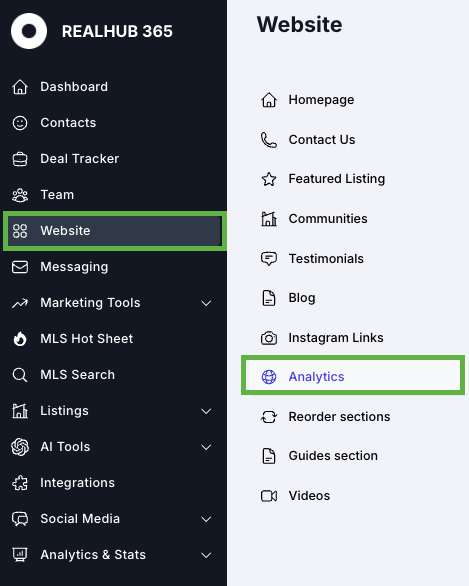
All three are set up in the same place: in your RealHub365 CRM, click WEBSITE in the left-side menu, then ANALYTICS.
Google Analytics (GA4)
Your website is enhanced with Google Analytics 4 (GA4), Google’s latest web analytics platform. It tracks and reports website traffic and user interactions, with more advanced insights than the older Universal Analytics.
What GA4 Does
Data Collection
- Collects how users interact with your site: page views, button clicks, form submissions, video plays, and more.
User-Centric Tracking
- Follows users across devices and sessions for a complete view of their behavior over time.
Event-Based
- Tracks actions (events) like page views and scrolls, not just sessions, for richer insight.
Machine Learning
- Uses AI to fill gaps where data is incomplete due to privacy changes like cookie restrictions.
Before You Start
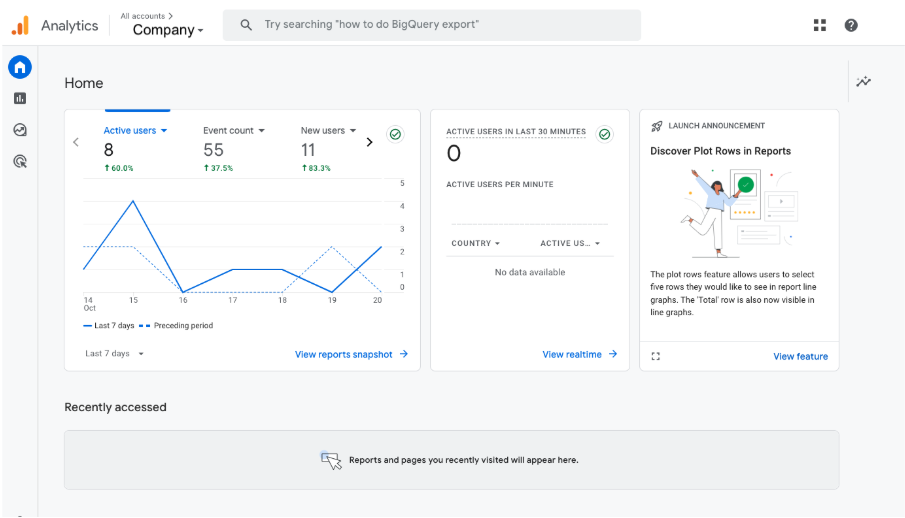
Log into your Google Analytics dashboard with your business account at analytics.google.com. You should see a screen like this:
1Copy Your Google Analytics Code
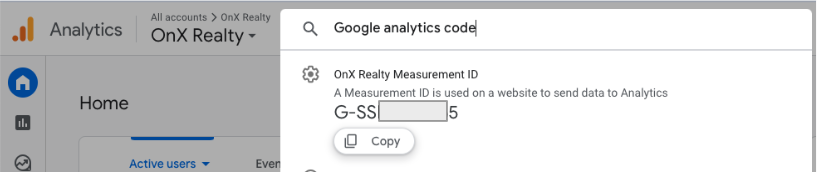
- In the Google Analytics search field at the top, type “Google Analytics Code” and press Enter.
- The code appears in the results. Select COPY.
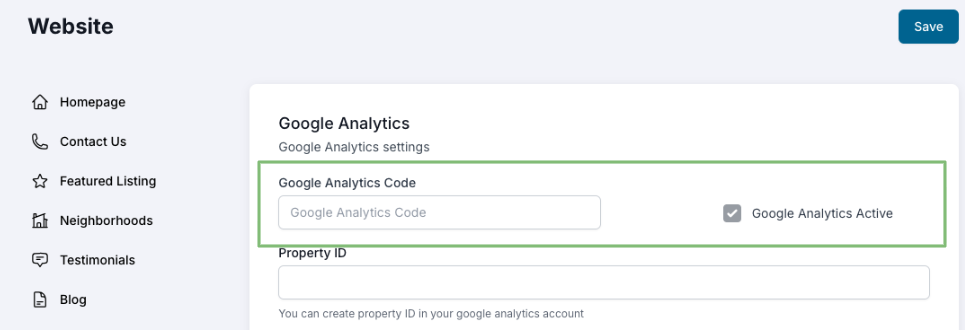
- Back in RealHub365, paste the code into the Google Analytics Code field.
2Copy Your Property ID
- In the Google Analytics search field, type “Property ID” and press Enter.
- The ID appears in the results. Select COPY.
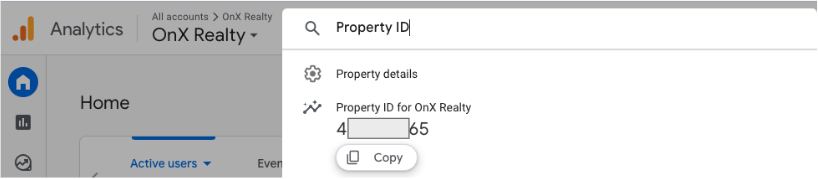
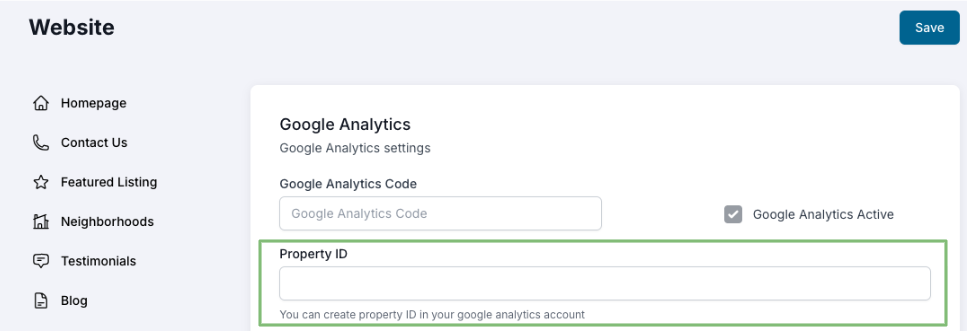
- Back in RealHub365, paste the ID into the Property ID field.
3Enable the GA4 API
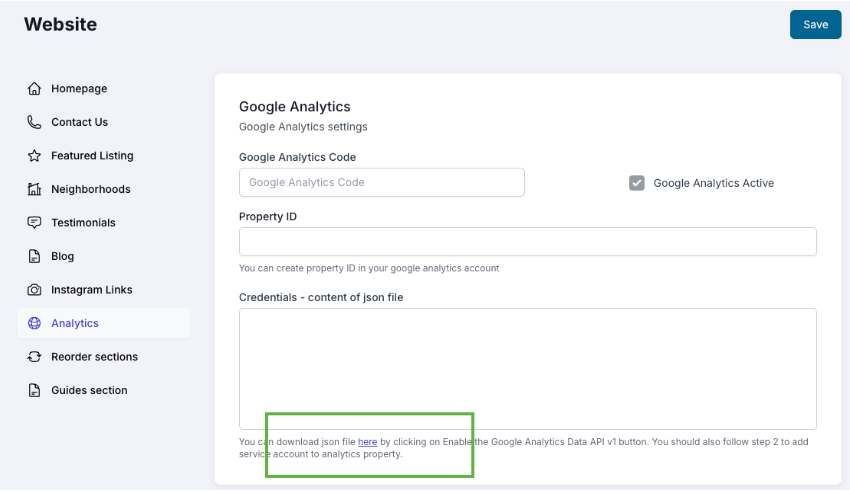
- In RealHub365, click where it says “here”, as shown below.
- On the page that opens, click Enable the Google Analytics Data API v1.
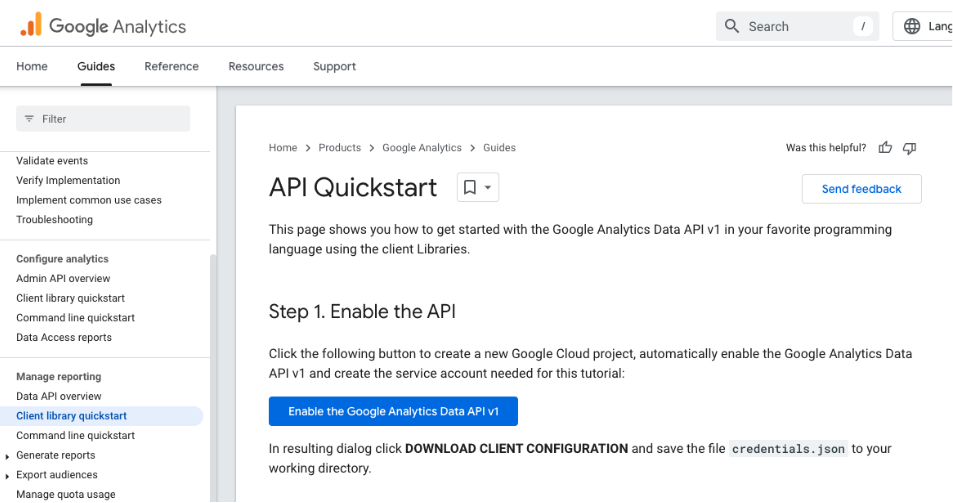
- Leave the Project Name as Quickstart and click NEXT.
- You’ll receive a confirmation that it’s complete.
4Download Your JSON Key File
Open your Google Cloud service accounts page and follow along:
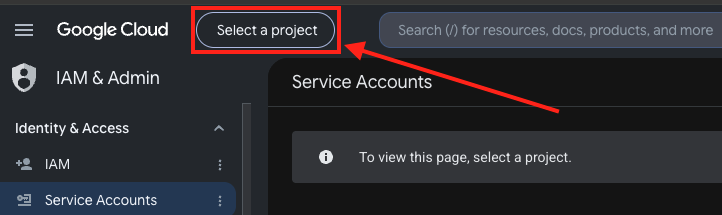
- Click Select a project at the top of the screen.
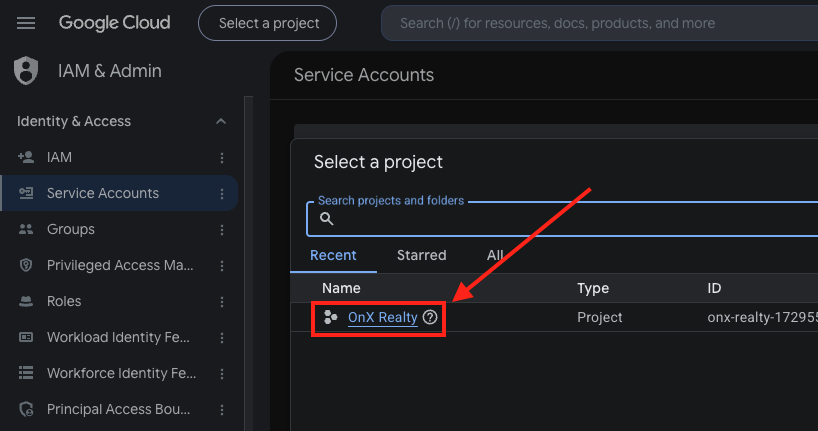
- Choose YOUR COMPANY from the options.
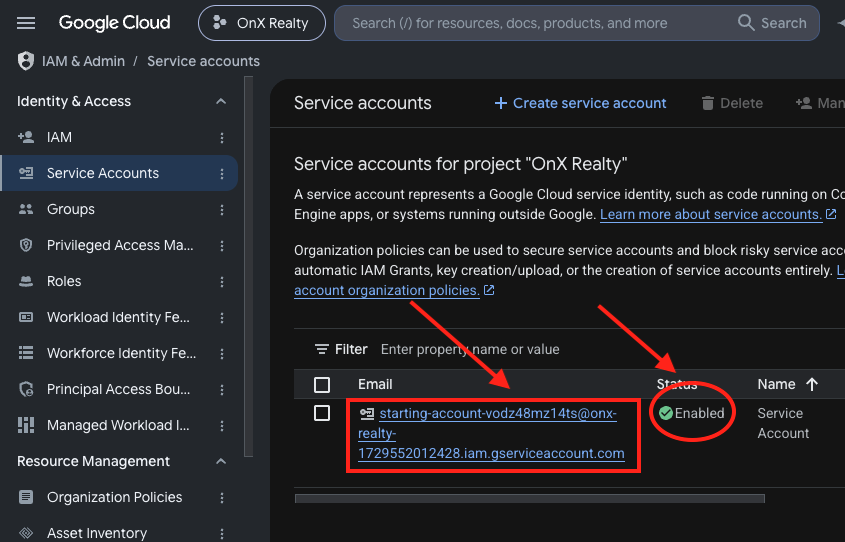
- Confirm the status shows Enabled, which means the GA4 API from Step 3 is on. Then click the service account link shown below.
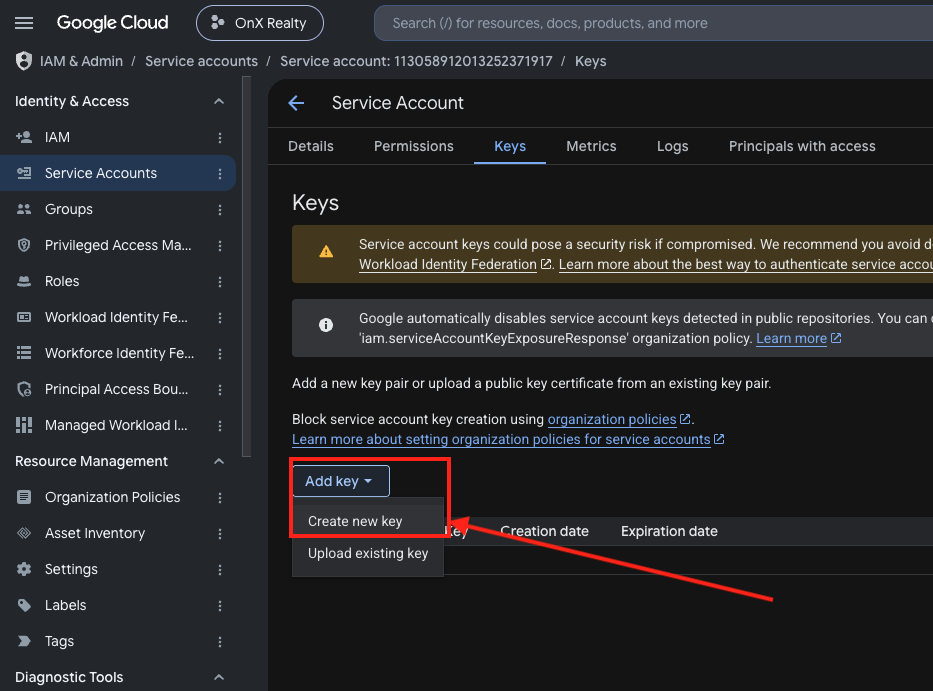
- On the next screen, click the Keys tab.
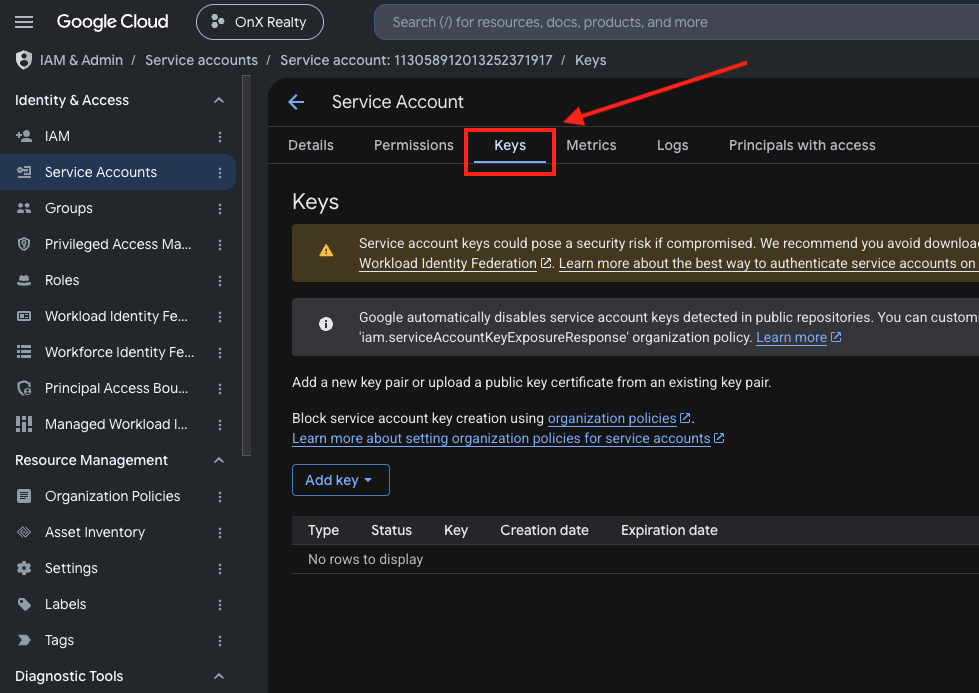
- Click Add key, then Create new key.
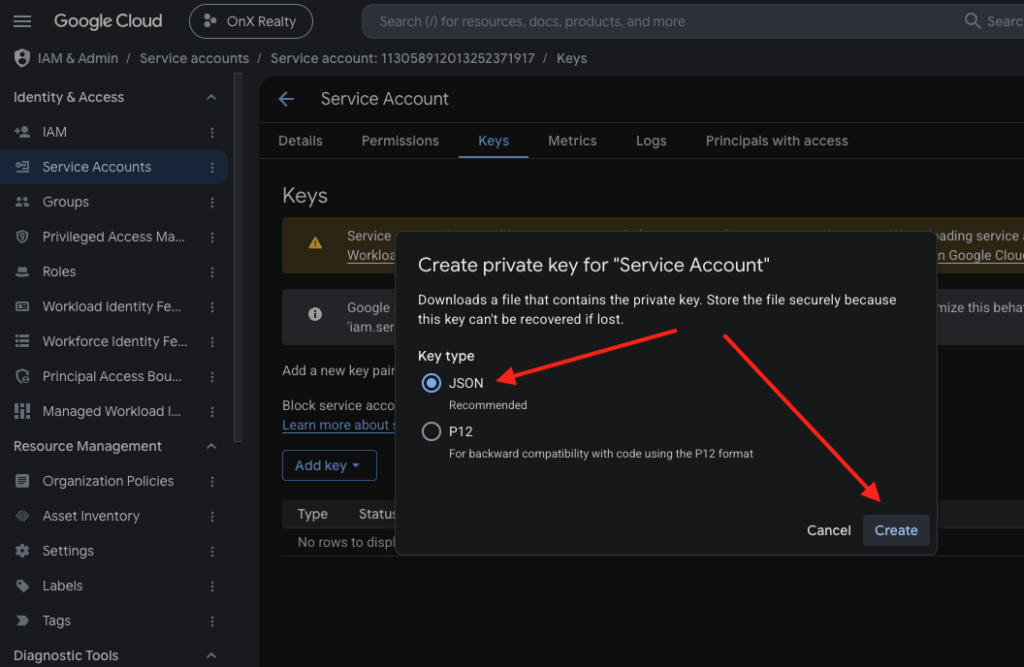
- Make sure JSON is selected, then click Create. The file downloads to your computer — note where you save it.
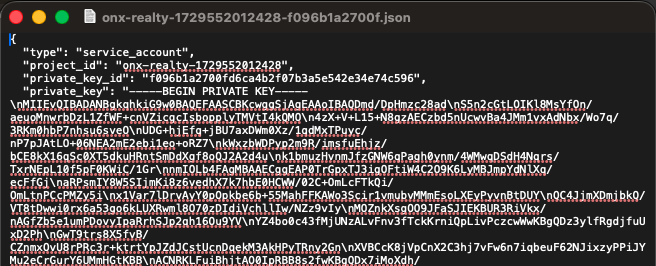
- Open the downloaded file and copy all of its text: Command + A, then Command + C on a Mac, or Ctrl + A, then Ctrl + C on a PC.
5Paste the JSON and Save
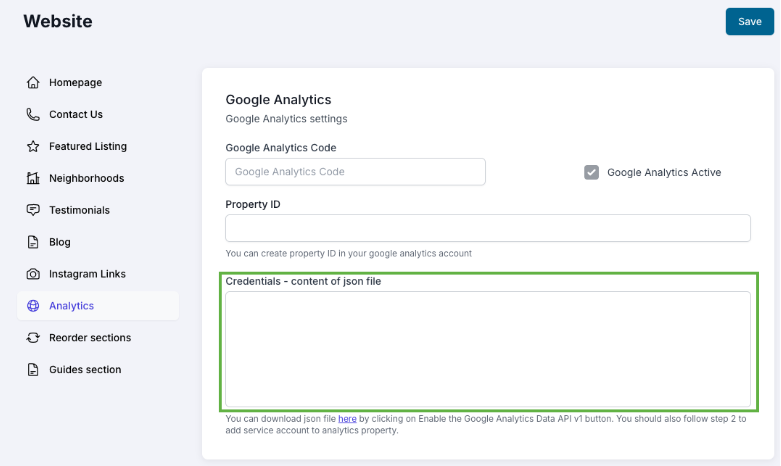
Back in RealHub365, paste the copied text into the text box (Command + V on a Mac, Ctrl + V on a PC).

Where to See Your GA4 Analytics
Log into analytics.google.com and choose the account in the upper left for your company website (your GA4 property). Inside, you’ll find:
- Standard reports — user acquisition, engagement, and events.
- Real-time reports — what’s happening on your site right now.
- Event reports — the specific actions users take on your site.
- Conversions — if you’ve set up conversion tracking (such as form submissions), how many users convert and from which sources.
For more on GA4, use the help resources inside your Google Analytics account.
Metricool Analytics (Social)
Your Social Media Hub includes analytics that show how well your social media marketing is working, tracking traffic and interactions from your posts and ad campaigns.
Set Up Metricool
- On the RealHub365 Analytics screen, click the link below the Metricool section.
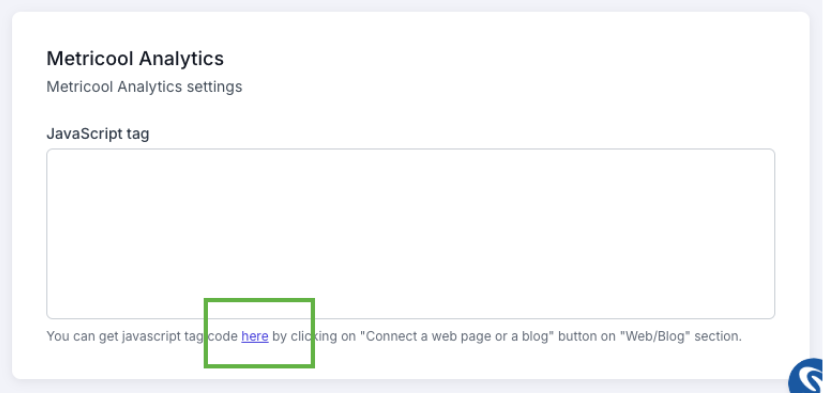
- Social Media Connect opens. Click Brand Settings at the bottom of the accounts menu.
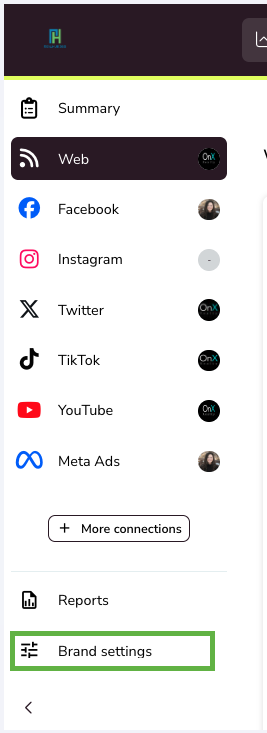
- Under Web, add your website URL and click ACCEPT.
- Click the SETTINGS button on the Web line item.
- On the next screen, select the JavaScript option.
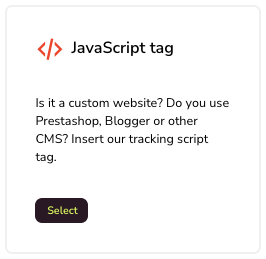
- Copy the code by clicking the copy icon at the lower right.
- Return to the RealHub365 Analytics page, paste the code into the text box, and click SAVE.
Meta Pixel
The Meta Pixel (formerly Facebook Pixel) is a snippet of code on your website that tracks what people do after interacting with your Facebook and Instagram ads. It helps you:
- Measure how effective your ads are.
- Build custom audiences for retargeting.
- Optimize campaigns for conversions and find new customers.
- See which actions lead to results, so you can spend your ad budget more wisely.
Add Your Pixel
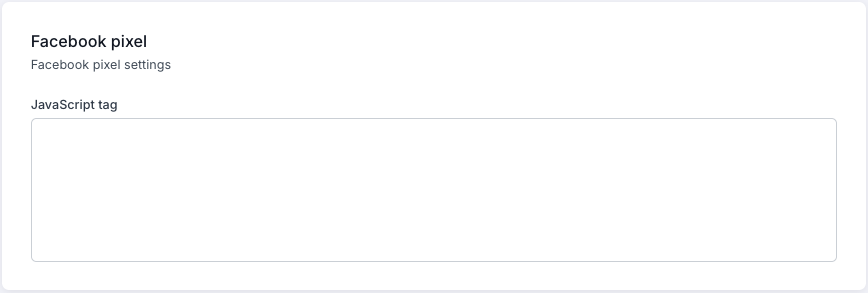
Your RealHub365 website supports the Meta Pixel out of the box. Log into your Meta Business advertising account, copy your pixel code, and paste it into the Meta Pixel field.
Check your numbers monthly
Set a monthly reminder to review your GA4 and Metricool reports. Note which pages, posts, and ads bring in the most visitors and leads, and do more of what works.